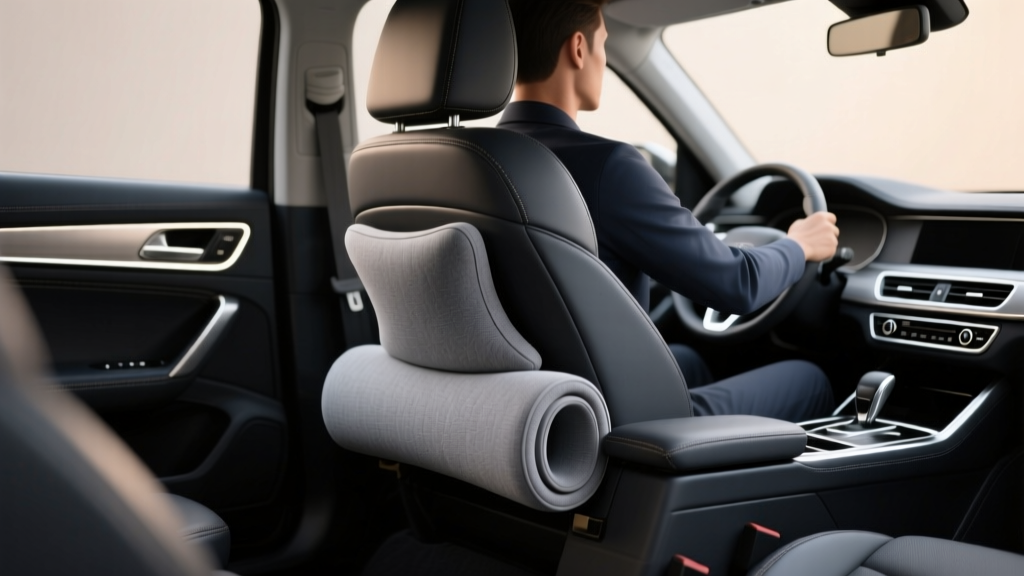
Lumbar Roll Installation: Pro Tips for Cars (2026)
A supportive seat can make a great car feel even better?and a mediocre seat feel tolerable on long drives. If you?ve ever stepped out of your vehicle with a tight lower back, sore hips, or that ?folded-up? feeling after a commute, there?s a good chance your seat isn?t supporting your lumbar spine correctly. Many factory seats offer limited lumbar adjustment, and some trims skip lumbar support entirely to cut costs.
A lumbar roll upgrade is one of the most practical, budget-friendly car interior improvements you can make. It?s fast, reversible, and it can dramatically improve driving comfort and posture?especially if you drive daily, road-trip often, or share a vehicle with drivers of different heights. This guide walks you through professional-style lumbar roll installation options, from simple external straps to hidden under-upholstery installs that look factory.
You?ll get step-by-step instructions, product comparisons, fitment tips for common seat designs, and real-world examples of what works (and what doesn?t). If you want a cleaner look, better ergonomics, or a more supportive driving position, this is a smart upgrade to learn.
What Is a Lumbar Roll (and Why It Works)
A lumbar roll is a firm or semi-firm cushion designed to support the inward curve of your lower back (the lumbar spine). When your lumbar area isn?t supported, your pelvis tends to roll backward, flattening the natural curve in your spine. Over time, that can lead to fatigue, stiffness, and poor posture behind the wheel.
Benefits you can actually feel
- Reduced lower-back fatigue on commutes and long trips
- Improved posture (less slouching, better shoulder positioning)
- More stable driving position, especially during spirited driving
- Better seat fit if your seat feels too ?flat? or unsupportive
- Easy adjustability if you choose an external strap-on roll
Lumbar roll vs. lumbar cushion vs. built-in lumbar
- Lumbar roll: Usually cylindrical or contoured; firmer; focused support where you need it.
- Lumbar cushion/pillow: Often larger and softer; can push you too far forward if overstuffed.
- Factory lumbar: Best when it?s well-designed; inconsistent across brands and trims.
Choosing the Right Lumbar Roll for Your Seat
Before you install anything, choose a roll that matches your seat style and your comfort goals. The right size and firmness matter more than the brand name.
Key selection factors
- Firmness: Too soft won?t support; too hard can create pressure points. Medium-firm foam works for most drivers.
- Size/diameter: A 3?5 inch diameter roll fits many automotive seats. Taller drivers often prefer slightly larger support.
- Cover material: Breathable mesh helps in warm climates; leatherette looks OEM but can trap heat.
- Mounting style: Strap-on (quick), friction-fit (temporary), or under-upholstery (cleanest look).
- Seat design: Integrated headrests, aggressive bolsters, and perforated leather each affect fit and stability.
Real-world example: why ?bigger? isn?t better
Drivers often buy an oversized memory foam cushion hoping for ?luxury comfort,? then wonder why they feel cramped. A thick pillow can push your shoulders forward and shorten your reach to the steering wheel. A properly sized lumbar roll supports the spine without changing your entire seating geometry.
Tools and Supplies You May Need
The tool list depends on the installation method. For a basic strap-on roll, you?ll barely need anything. For a hidden under-upholstery upgrade, plan like a pro.
- Measuring tape (or ruler)
- Plastic trim tools (for gently releasing seat back panels where applicable)
- Hog ring pliers and hog rings (only for advanced upholstery access on some seats)
- Hook-and-loop (Velcro) strips (high-quality automotive grade)
- Spray adhesive safe for foam/fabric (optional, for under-cover mounting)
- Zip ties (for tidy strap management)
- Microfiber towel (protects upholstery while you work)
Installation Methods: Pick Your Level
There are three practical ways to install a lumbar roll. Choose based on the look you want and how comfortable you are working around seat trim.
Method 1: External strap-on lumbar roll (fastest and most adjustable)
Best for: daily drivers, shared vehicles, anyone who wants quick results with no disassembly.
Step-by-step
- Set your driving position first. Adjust seat height, distance to pedals, and steering wheel reach/tilt. Installing lumbar support before setting your posture often leads to the wrong placement.
- Find your lumbar ?sweet spot.? Sit upright, then place the roll at the small of your back?typically just above your beltline.
- Route the straps. Wrap straps around the seat back. If your seat has large side bolsters, route straps through the gap between bolster and backrest if possible for better stability.
- Center and tighten gradually. Tighten until the roll stays in place without compressing the cushion flat.
- Test drive and micro-adjust. Move it up/down by about 1 inch at a time until your lower back feels supported without being pushed forward.
Pro tips
- If the roll slides, add a strip of non-slip shelf liner between the roll and seat.
- Keep strap buckles away from door-side bolster to prevent rubbing during entry/exit.
- For leather seats, choose a roll with a grippy back panel or rubberized strip.
Method 2: Semi-hidden install using Velcro or anchor points (cleaner look, still reversible)
Best for: owners who want fewer visible straps and a more ?factory? vibe without opening the upholstery.
Step-by-step
- Identify stable anchor zones. Many seats have a seam line or a fabric panel on the rear of the seat back where straps can be hidden.
- Use automotive-grade hook-and-loop. Apply the hook side to the lumbar roll (or its cover) and the loop side to a removable seat cover layer or a sacrificial fabric panel. Avoid sticking directly to delicate perforated leather.
- Position the roll precisely. Sit in the seat and mark the ideal height using painter?s tape on the seat side bolster.
- Press and hold. Apply firm pressure for 30?60 seconds. If using adhesive-backed Velcro, let it cure per the manufacturer?s instructions before heavy use.
- Road test. Check for shifting after a week and re-seat the Velcro if needed.
Pro tips
- If your seat is heated/ventilated, keep added materials minimal to avoid blocking airflow.
- Use a removable cover or thin seat protector as the Velcro mounting surface if you?re cautious about adhesives on OEM upholstery.
Method 3: Under-upholstery lumbar roll (most OEM-looking, most work)
Best for: enthusiasts who want a truly integrated lumbar upgrade that doesn?t look like an add-on.
Safety note: Seats can contain airbags, occupancy sensors, and wiring. If you?re removing a seat or working near connectors, disconnect the battery and follow service manual guidance. If you?re not confident, a professional upholstery shop can install this cleanly and safely.
Step-by-step (general approach)
- Inspect the seat construction. Look for a rear panel that unclips or unzips. Some seats allow access without removing the seat from the car.
- Expose the inner upholstery layer carefully. Use plastic trim tools to release clips. Avoid metal tools that can gouge plastic or cut upholstery.
- Locate the lumbar zone. You?re aiming for mid-to-lower back support?not the tailbone area. Most people prefer placement where the seat back naturally curves inward.
- Secure the roll. Use hook-and-loop, a fabric sleeve, or light spray adhesive (foam-safe) to keep it from migrating. Do not block airbag tear seams or interfere with seat frame movement.
- Reassemble and test. Reinstall panels and confirm nothing pinches wiring. Sit and test for hot spots or uneven pressure.
- Fine-tune. If it feels too aggressive, reduce thickness or move the roll up slightly. Small changes matter.
Pro tips
- Choose a lumbar roll with a flatter profile for under-upholstery installs?bulky cylinders can create visible ?bulges.?
- Keep any adhesive away from ventilation channels and heating elements.
- If you feel pressure on one side, the roll is likely off-center?reposition before it breaks in unevenly.
Product Recommendations and What to Look For
Because seats vary so much, the best lumbar roll is the one that fits your body and stays put. Here are practical categories and what they?re good at.
Best overall: adjustable strap-on foam lumbar roll
- Why it works: Easy to dial in, stable, good support-to-price ratio.
- Look for: dense foam (not squishy), breathable cover, long straps, low-profile buckles.
- Ideal for: commuters, rideshare drivers, shared family cars.
Best for hot climates: mesh-backed lumbar roll
- Why it works: reduces sweaty back feeling, especially on leather seats.
- Look for: spacer mesh or perforated fabric, washable cover.
Best OEM look: slim contoured roll for under-upholstery
- Why it works: hidden, clean, doesn?t change the cabin aesthetic.
- Look for: tapered edges, moderate thickness, non-crumbling foam.
Quick comparison: foam vs. memory foam vs. inflatable
- Firm foam: consistent support, holds shape, great for posture.
- Memory foam: comfortable but can feel ?mushy? and warm; sometimes too thick.
- Inflatable lumbar: adjustable, packs small; can feel uneven if overinflated and may squeak or shift.
Common Mistakes to Avoid
- Placing the roll too low. Support under the beltline can push your pelvis forward awkwardly. Aim for the small of your back.
- Overcorrecting posture. If you feel forced upright like a board, the roll is too thick or too high.
- Ignoring seat distance after install. Added support can move you forward slightly?re-check pedal reach and steering wheel position.
- Blocking ventilation or heat zones. Thick cushions can reduce seat ventilation performance.
- Using weak adhesive or bargain Velcro. Heat cycles inside a car can defeat low-quality adhesives.
- Interfering with airbag seams. Never mount anything over side-airbag tear seams or anchor straps around airbag-equipped areas in a way that could hinder deployment.
Dialing In Comfort: A Simple Fitment Checklist
Use this checklist after installation to confirm your lumbar upgrade is helping rather than hurting.
- Your hips feel level, not tucked under.
- Your shoulders rest naturally against the seat back.
- You?re not reaching for the wheel; elbows remain slightly bent.
- No sharp pressure point develops after 20?30 minutes.
- The roll doesn?t migrate when cornering or entering/exiting.
FAQ: Lumbar Roll Installation and Upgrades
How high should a lumbar roll sit on a car seat?
Most drivers prefer it just above the beltline, supporting the inward curve of the lower back. If it feels like it?s pushing your ribs or shoulder blades, it?s too high. If it feels like it?s under your tailbone, it?s too low.
Will a lumbar roll damage leather seats?
A quality roll with a smooth backing typically won?t damage leather, but friction and trapped grit can. Keep the contact area clean, avoid rough textures, and periodically remove the roll to wipe the seat down.
Can I use a lumbar roll with heated or ventilated seats?
Yes, but choose a lower-profile roll and breathable materials. Thick cushions can reduce ventilation airflow and slightly change how quickly heat reaches your back.
Why does my lumbar roll keep sliding down?
Common causes include loose straps, slick leather, or a roll placed too low where the seat back angle encourages sliding. Tighten gradually, move it up 1?2 inches, and consider a non-slip liner between the roll and seat.
Is an inflatable lumbar pillow better than foam?
Inflatable options are great for adjustability and travel, but they can feel ?bouncy? or uneven if overinflated. Foam tends to feel more consistent and stable for daily driving.
Should I get professional help for an under-upholstery install?
If your seat has side airbags, complex trim panels, or you?re unsure about seat wiring and clips, an upholstery shop is a smart choice. They can integrate the roll cleanly and avoid damaging trim or upholstery.
Next Steps: Make Your Seat Fit You
A lumbar roll installation is one of those rare car interior upgrades that delivers immediate results without major cost or downtime. Start with a strap-on lumbar roll to find your ideal position and firmness. Once you?ve nailed the feel, decide whether you want to keep it adjustable or move to a cleaner, semi-hidden or under-upholstery setup.
- Try it this week: Install a strap-on roll and test it on your regular commute.
- Fine-tune: Adjust in small increments over a few days, not all at once.
- Upgrade the look: If you love the support, consider a cleaner mounting method or a slimmer roll for a more OEM appearance.
Want more practical interior comfort upgrades and DIY-friendly installs? Explore more guides on carinteriormix.com and keep building a cabin that feels as good as it looks.